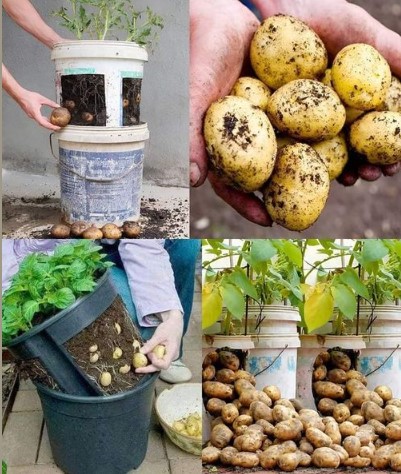
How to Grow Potatoes in Old Paint Buckets
1. Prepare the Buckets:
- Clean the buckets thoroughly to remove any residue.
- Drill several drainage holes at the bottom and lower sides of each bucket to ensure proper water drainage.
2. Prepare the Potatoes:
- Chit the Seed Potatoes:
- Place the seed potatoes in a cool, light area until they sprout.
- Cutting the Potatoes:
- If using large potatoes, cut them into pieces, ensuring each piece has at least one eye or sprout.
- Allow the cut pieces to dry for a day to prevent rot.
3. Plant the Potatoes:
- Fill the bottom of each bucket with 4-6 inches of potting soil.
- Place 2-3 seed potatoes or pieces in each bucket, with the eyes facing up.
- Cover the potatoes with another 4-6 inches of soil.
4. Water and Care:
- Watering:
- Water the soil thoroughly after planting.
- Keep the soil consistently moist but not waterlogged.
- Adding Soil:
- As the potato plants grow, keep adding soil to cover the stems, leaving the top leaves exposed.
- Sunlight:
- Place the buckets in a sunny spot where they can receive 6-8 hours of sunlight daily.
5. Mulch (Optional):
- Add a layer of straw or mulch on top of the soil to help retain moisture and control weeds.
6. Harvesting:
- For Baby Potatoes:
- Harvest 2-3 weeks after the plants flower by carefully digging around the plants.
- For Mature Potatoes:
- Wait until the foliage turns yellow and dies back.
- Dump the bucket to harvest the potatoes.
Tips for Success:
- Choose early or mid-season potato varieties for better results.
- Regularly check the plants for pests and take appropriate measures if necessary.
- Use a balanced, slow-release fertilizer to provide the necessary nutrients.
By following these steps, you can successfully grow potatoes in old paint buckets, making use of available materials and space efficiently. Happy gardening!
- Crochet Butterfly Pattern
 The photo shows a 3D lace butterfly appliqué with two large upper wings, two smaller lower wings, a textured center body, and delicate picot edging. Because the photo does not show every stitch, the pattern below is a reconstructed pattern based on the visible design, rather than a guaranteed exact original pattern. Similar butterfly motifs commonly use chains, … Read more
- Blue Black White Snowflake Star Ornaments
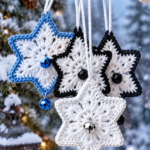 Materials Pattern Round 1 – CenterMake a magic ring with white yarn. Crochet 6 groups of stitches around the ring to create a small six-point flower center. Join with a slip stitch. Round 2 – Snowflake PetalsWork clusters and chain spaces around the center to form 6 pointed sections. Keep the stitches slightly loose so … Read more
- Crochet Pumpkin Pattern
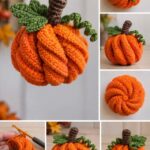 Twisted Crochet Pumpkin Ornament Materials Abbreviations Pumpkin Body Make 8 ribs. Row 1: Ch 26. Row 2: Starting in the 2nd chain from the hook, work 25 sc. Rows 3–34: Ch 1, turn. Work 25 sc in BLO across. Fasten off with a long tail. Sew the short edges together to form a tube. Using … Read more
- Crochet Snowflake Spiral Christmas Ornament
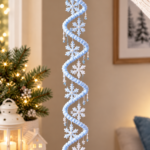 Materials White worsted weight cotton yarn2.5 mm crochet hookScissorsYarn needleFiberfill (optional, for a fuller spiral)Starch or fabric stiffener (optional)Blocking pins and mat Abbreviations MR – Magic Ringch – Chainsl st – Slip Stitchsc – Single Crochethdc – Half Double Crochetdc – Double Crochettr – Treble Crochetinc – 2 sc in the same stitchst – Stitchrep … Read more
- Crochet Snowflake Ornament
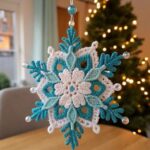 Materials White cotton crochet thread Turquoise cotton thread Light aqua cotton thread Crochet hook 1.75–2.5 mm Small pearl beads 1 large turquoise bead 1 small white bead Yarn needle Scissors Fabric stiffener, optional Abbreviations MR = magic ring ch = chain sl st = slip stitch sc = single crochet hdc = half double crochet … Read more