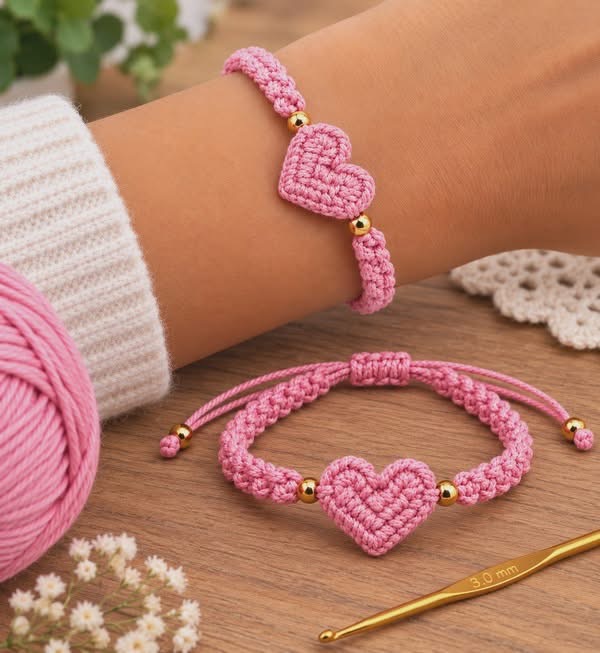
A delicate adjustable bracelet featuring a crocheted heart centerpiece, textured pink cord, and small gold beads.
Materials
- Pink cotton crochet thread or fine yarn
- 3.0 mm crochet hook
- 4 small gold beads
- Yarn needle
- Scissors
- Optional: small measuring tape
Abbreviations
- ch — chain
- sc — single crochet
- hdc — half double crochet
- dc — double crochet
- sl st — slip stitch
- st — stitch
1. Crocheted Heart
Work with pink yarn.
Round 1
Make a magic ring.
- Ch 2.
- Work 3 dc, 3 hdc, 1 ch, 3 hdc, 3 dc into the ring.
- Pull the ring closed.
- Sl st into the center.
Fasten off, leaving a long tail.
Shape the Heart
Using the yarn tail and a yarn needle, gently tighten and shape the center indentation at the top of the heart.
The finished heart should measure approximately 3–4 cm wide.
For a thicker heart, work a second identical heart and stitch the two pieces together around the edges.
2. Bracelet Cord
Cut a long piece of pink yarn approximately 70–80 cm (28–32 in) long.
Fold the yarn so you can crochet with doubled thread for extra strength.
Textured Cord
- Make a slip knot.
- Ch 3.
- Work sc into the second chain from the hook.
- Continue making short sc stitches along the chain.
- Keep the stitches relatively tight to create the raised, textured appearance shown in the photo.
Make two matching cord sections, approximately 12–15 cm (5–6 in) each.
3. Connect the Heart
Place one gold bead on each side of the heart.
Attach one cord to the left side of the heart with a small knot or several tight stitches.
Thread a gold bead onto the cord and position it close to the heart.
Repeat on the opposite side:
Cord → gold bead → heart → gold bead → cord
Secure the connections firmly with a yarn needle.
4. Adjustable Ends
Continue the pink cords beyond the bracelet so they can be adjusted around the wrist.
At each end:
- Make a small loop.
- Work several sc stitches around the loop.
- Finish with a tight knot.
- Add a small gold bead to the end if desired.
The bracelet should have two long cords that can slide through the adjustable center section.
5. Adjustable Closure
Bring the two long ends together.
Make a small sliding knot so the bracelet can be tightened or loosened.
A simple sliding closure:
- Cross one cord over the other.
- Wrap the end around the opposite cord 3–4 times.
- Pull the end through the wraps.
- Tighten gently.
- Repeat on the other side.
Trim excess yarn and secure the ends.
Finishing
- Check that all beads are securely attached.
- Hide the yarn ends inside the crocheted stitches.
- Gently stretch the bracelet to even out the stitches.
- Adjust the sliding closure to fit the wrist.
Finished look: pink textured crochet band + small gold beads + a raised pink heart in the center.