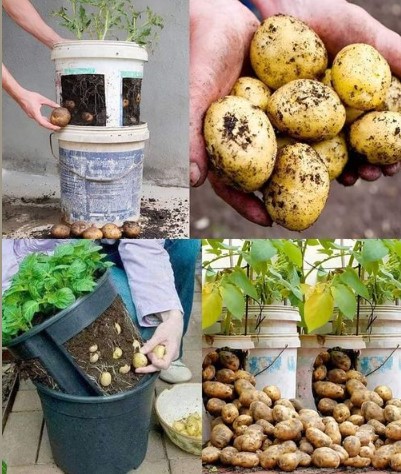
How to Grow Potatoes in Old Paint Buckets
1. Prepare the Buckets:
- Clean the buckets thoroughly to remove any residue.
- Drill several drainage holes at the bottom and lower sides of each bucket to ensure proper water drainage.
2. Prepare the Potatoes:
- Chit the Seed Potatoes:
- Place the seed potatoes in a cool, light area until they sprout.
- Cutting the Potatoes:
- If using large potatoes, cut them into pieces, ensuring each piece has at least one eye or sprout.
- Allow the cut pieces to dry for a day to prevent rot.
3. Plant the Potatoes:
- Fill the bottom of each bucket with 4-6 inches of potting soil.
- Place 2-3 seed potatoes or pieces in each bucket, with the eyes facing up.
- Cover the potatoes with another 4-6 inches of soil.
4. Water and Care:
- Watering:
- Water the soil thoroughly after planting.
- Keep the soil consistently moist but not waterlogged.
- Adding Soil:
- As the potato plants grow, keep adding soil to cover the stems, leaving the top leaves exposed.
- Sunlight:
- Place the buckets in a sunny spot where they can receive 6-8 hours of sunlight daily.
5. Mulch (Optional):
- Add a layer of straw or mulch on top of the soil to help retain moisture and control weeds.
6. Harvesting:
- For Baby Potatoes:
- Harvest 2-3 weeks after the plants flower by carefully digging around the plants.
- For Mature Potatoes:
- Wait until the foliage turns yellow and dies back.
- Dump the bucket to harvest the potatoes.
Tips for Success:
- Choose early or mid-season potato varieties for better results.
- Regularly check the plants for pests and take appropriate measures if necessary.
- Use a balanced, slow-release fertilizer to provide the necessary nutrients.
By following these steps, you can successfully grow potatoes in old paint buckets, making use of available materials and space efficiently. Happy gardening!
- Terracotta Crochet Lace Table Runner
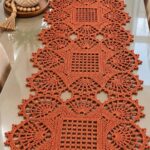 Skill Level: Intermediate to Advanced Finished Size: Approximately 40 × 150 cm (16 × 59 inches) Yarn Color: Terracotta / Burnt Orange Crochet Terms: US Terminology This elegant crochet table runner features square lattice centers, decorative triangular corners, delicate fan-shaped lace, and beautiful picot edging. This is a photo-inspired pattern, not the exact original designer’s … Read more
 - Crochet Santa Claus Christmas Ornament
 Create an adorable handmade Santa Claus ornament with a red Christmas hat, fluffy white beard, rosy cheeks, and a cute little nose. This festive crochet decoration is perfect for Christmas trees, holiday gifts, and handmade decorations. This is an original pattern inspired by the photo, not an exact transcription of the illustrated crochet chart. Materials … Read more
 - Baby Cow Amigurumi Crochet Pattern
 Adorable Pink & Cream Crochet Baby Cow with a Heart Baby Bottle This sweet baby cow amigurumi is a lovely handmade gift for babies, nursery decoration, or crochet lovers. Featuring soft cream yarn, caramel patches, pink details, a cute bow, and a miniature baby bottle, this project is full of charm. This is an original, … Read more
 - Crochet Butterfly Pattern
 The photo shows a 3D lace butterfly appliqué with two large upper wings, two smaller lower wings, a textured center body, and delicate picot edging. Because the photo does not show every stitch, the pattern below is a reconstructed pattern based on the visible design, rather than a guaranteed exact original pattern. Similar butterfly motifs commonly use chains, … Read more
 - Blue Black White Snowflake Star Ornaments
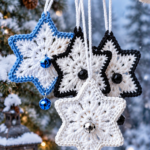 Materials Pattern Round 1 – CenterMake a magic ring with white yarn. Crochet 6 groups of stitches around the ring to create a small six-point flower center. Join with a slip stitch. Round 2 – Snowflake PetalsWork clusters and chain spaces around the center to form 6 pointed sections. Keep the stitches slightly loose so … Read more