Ice Cream Sandwich Bars A Frozen Dream Come True
Introduction
There’s something purely magical about biting into a chilled, creamy ice cream sandwich on a hot summer day. It’s nostalgic, comforting, and simply irresistible. These homemade Ice Cream Sandwich Bars bring together crunchy graham crackers, velvety chocolate layers, and fluffy whipped filling — a no-bake dessert that’s perfect for potlucks, parties, or freezer treats.
History
Ice cream sandwiches have roots dating back to New York City in the 1890s, where street vendors sold slabs of ice cream between sheets of paper or thin wafers. Over time, innovations like cookie-based versions and chocolate-dipped sandwiches emerged, turning the humble ice cream sandwich into a global favorite.
Graham crackers were invented in the early 1800s by Sylvester Graham as a part of a health movement — and later became a staple in s’mores, pies, and now, this no-fuss dessert bar.
Ingredients
- 1 box of graham crackers (about 18–20 full sheets)
- 1 tub (8 oz) of whipped topping (Cool Whip or homemade)
- 1 box (3.9 oz) instant chocolate pudding mix
- 2 cups cold milk
- 1/2 cup mini chocolate chips or crushed Oreos (optional)
- Parchment paper and a 9×13″ pan
Instructions & Methods**
1. Prepare the Chocolate Layer
- In a large bowl, whisk the chocolate pudding mix with cold milk for 2 minutes until thickened.
- Fold in the whipped topping gently to make it light and airy.
- (Optional: Stir in mini chocolate chips or crushed Oreos for crunch.)
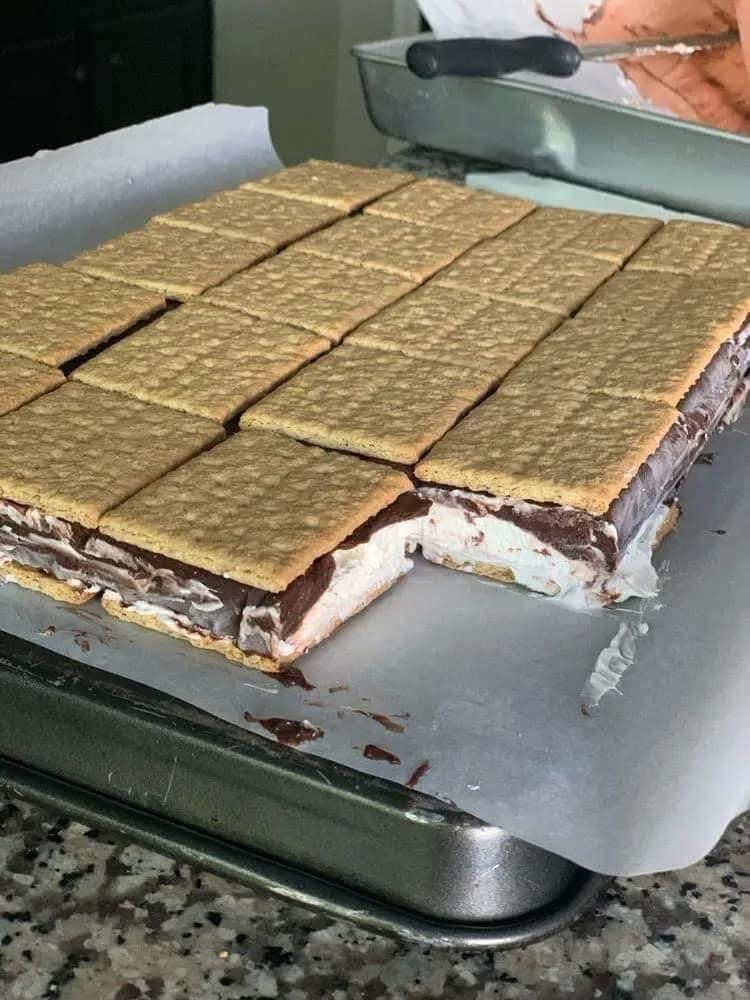
2. Assemble the Base
- Line a 9×13” pan with parchment paper.
- Place graham crackers in a single layer to cover the bottom of the pan. Break crackers if needed to fit edges.
3. Add the Filling
- Spread the prepared chocolate-cream mixture evenly over the graham cracker base using a spatula.
4. Top with Graham Crackers
- Add another layer of graham crackers on top, pressing gently so they stick.
5. Freeze
- Cover the pan with plastic wrap or foil and freeze for at least 4 hours or until completely firm.
6. Slice and Serve
- Once frozen, remove from pan using the parchment paper.
- Slice into individual squares using a sharp knife.
- Serve immediately or wrap and freeze for later.
Benefits
- No-bake & kid-friendly: Perfect for little hands to help assemble.
- Customizable: Add peanut butter, Nutella, or fruit puree.
- Make-ahead dessert: Stores in the freezer for weeks.
- Portion-controlled: Pre-sliced for easy serving.
- Budget-friendly: Uses simple pantry staples.
Formation Tip**
To make clean slices, dip your knife in warm water and wipe between cuts. This helps create that picture-perfect square every time.
Dessert Lovers Unite**
Ice cream sandwich bars are beloved by all ages — kids giggle with sticky fingers, adults sneak one from the freezer after dinner, and grandparents reminisce about old-school ice cream trucks. These bars are perfect for family BBQs, birthday parties, and after-school treats.
Nutrition (Approx. per square, assuming 20 squares)*
- Calories: 170 kcal
- Fat: 7g
- Carbohydrates: 25g
- Sugar: 15g
- Protein: 2g
- Fiber: 1g
- Calcium: 6% DV
(Values may vary depending on brands used and add-ins.)
Conclusion
This easy frozen dessert brings joy in every creamy, crunchy bite. Whether you’re feeding a crowd or stocking the freezer for late-night cravings, homemade Ice Cream Sandwich Bars are the answer. They’re fuss-free, freezer-friendly, and fabulous — just like the people who love them.
Final Note for Dessert Lovers
If you grew up waiting for the ice cream truck or remember peeling open a store-bought sandwich with sticky hands, this recipe will teleport you back to simpler times. And if you’re making these for someone special? Trust us — they’ll fall for you all over again.