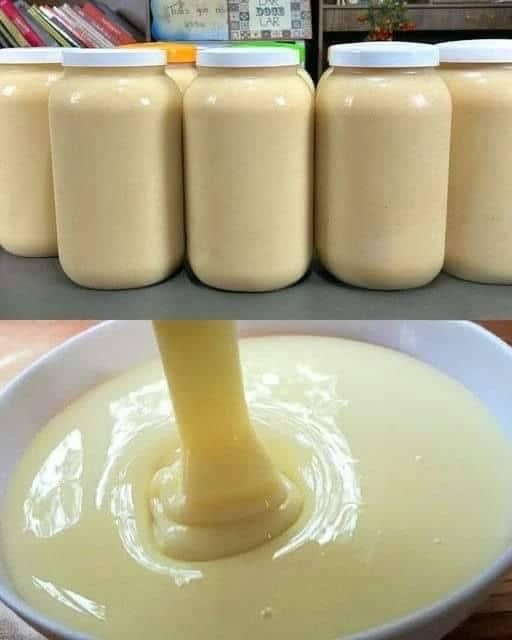
Homemade Sweetened Condensed Milk A Full Recipe Breakdown

Introduction
Sweetened condensed milk has been a kitchen staple for centuries, used in countless recipes ranging from desserts to beverages. Its creamy texture and sweet flavor make it versatile, perfect for indulgent treats like caramel sauces, cakes, and coffee. While store-bought versions are convenient, making your own condensed milk allows you to control the ingredients, taste, and quality.
In this article, we’ll dive deep into a complete recipe for homemade sweetened condensed milk, covering its history, benefits, step-by-step instructions, and nutritional information.
Ingredients
To make a batch of rich and creamy homemade sweetened condensed milk, you’ll need:
- 2 cups (500ml) whole milk
- 1 cup (200g) granulated sugar
- 2 tablespoons unsalted butter
- 1/4 teaspoon baking soda (optional, for creaminess)
- A pinch of salt (optional, to enhance flavor)
Instructions
- Preparation:
- Gather all ingredients and a medium-sized saucepan.
- Measure ingredients accurately to achieve the best consistency.
- Combine Milk and Sugar:
- In the saucepan, mix the milk and sugar.
- Heat over medium heat, stirring continuously until the sugar dissolves.
- Simmer Gently:
- Reduce heat to low and let the mixture simmer. Stir occasionally to prevent sticking or scorching.
- Add Butter:
- After 15 minutes, add the unsalted butter for a richer texture.
- Optional Step:
- If using baking soda, add it halfway through cooking. This helps create a smoother texture.
- Thickening:
- Continue simmering until the mixture thickens, about 30–40 minutes. It should reduce by half and coat the back of a spoon.
- Cool and Store:
- Let the condensed milk cool to room temperature.
- Transfer to sterilized jars or airtight containers. It will thicken further as it cools.
Methods
- Traditional Stove Method:
- The most common approach involves slow simmering on a stovetop to achieve a caramelized flavor and thick consistency.
- Shortcut Blender Method:
- For a quicker version, blend powdered milk, sugar, boiling water, and butter until smooth. This doesn’t replicate the slow-cooked flavor but works in a pinch.
History
The origins of sweetened condensed milk date back to the early 19th century when it was developed as a way to preserve milk for extended periods. Gail Borden, an American inventor, patented the process in 1856. During wartime, it became a valuable ration due to its long shelf life. Over time, it transformed from a necessity into a luxury ingredient in many cuisines.
Benefits
- Customizable:
- Homemade condensed milk allows you to adjust the sweetness or use alternative sweeteners for healthier versions.
- Preservative-Free:
- Unlike store-bought options, homemade versions are free from additives or stabilizers.
- Versatility:
- Use it in desserts like fudge, tres leches cake, or Vietnamese coffee for a creamy richness.
Formation
Homemade condensed milk forms when milk is gently heated, causing water to evaporate while sugars caramelize and thicken the liquid. Adding butter and baking soda enhances the creaminess and flavor.
Nutrition
Per tablespoon serving:
- Calories: 60
- Fat: 2.5g
- Carbohydrates: 9g
- Protein: 1g
- Calcium: 4% DV
- Sugar: 8g
Conclusion
Homemade sweetened condensed milk is a game-changer for home bakers and food lovers alike. Its rich, velvety texture and natural sweetness enhance any recipe, from cakes to coffees. Plus, the satisfaction of making your own from scratch adds an unbeatable touch of love to your dishes.
Whether you’re crafting decadent desserts or adding a dollop to your morning brew, this homemade condensed milk recipe will surely become a household favorite.
For the Lovers of Homemade Goodness
This recipe is perfect for those who adore the art of homemade creations, enjoy experimenting in the kitchen, or simply appreciate knowing what goes into their food. Get creative and add vanilla or almond extract for a unique twist!
If you try this recipe, let me know how it turns out. Happy cooking!