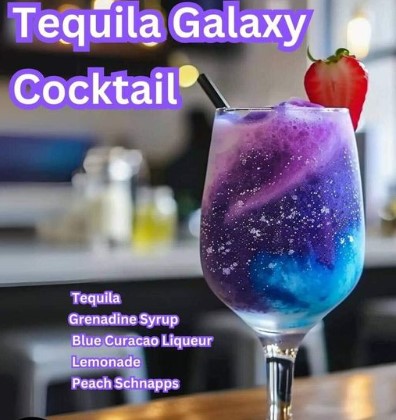
Description:
This mesmerizing cocktail features a stunning blue and purple layered effect, making it a feast for both the eyes and the palate. Perfect for any occasion that calls for a bold and beautiful drink!
Ingredients:
For the Blue Layer:
- 0.75 oz Blue Curacao Liqueur
- 1 oz Lemonade
- 1 oz Peach Schnapps
- 6 oz ice
For the Purple Layer:
- 0.25 oz Blue Curacao Liqueur
- 1 oz Tequila
- 1 oz Lemonade
- 0.75 oz Grenadine Syrup
- 6 oz ice
Instructions:
- Prepare the Blue Layer:
- In a blender, combine 0.75 oz Blue Curacao Liqueur, 1 oz Lemonade, 1 oz Peach Schnapps, and 6 oz ice.
- Blend until smooth and set aside in the freezer to chill.
- Prepare the Purple Layer:
- In the same or a clean blender, combine 0.25 oz Blue Curacao Liqueur, 1 oz Tequila, 1 oz Lemonade, 0.75 oz Grenadine Syrup, and 6 oz ice.
- Blend until smooth and set aside in the freezer to chill.
- Prepare the Glass:
- To achieve a sparkle effect on the glass, lightly wet the outside of the glass and freeze it until a layer of condensation forms, creating a frosty appearance with white sparkles.
- Layer the Cocktail:
- Retrieve the chilled blue and purple mixtures from the freezer.
- Slowly pour the blue mixture into the bottom of the prepared glass.
- Carefully and slowly pour the purple mixture over the back of a spoon, tilting the glass slightly to create a layered effect without mixing the colors.
- Serve:
- Serve immediately and enjoy the visual and taste sensation of this captivating blue and purple cocktail.
Notes:
- For the best visual effect, use clear glassware to highlight the distinct layers.
- Ensure both mixtures are well chilled before layering to maintain the separation of colors.
- Adjust the sweetness and alcohol content to your preference by varying the amounts of Grenadine Syrup and Tequila.
Bold, beautiful, and delicious, this cocktail is sure to impress!
- Monster Peanut Butter Cheesecake Pie
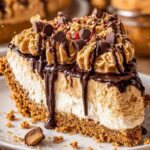 Ingredients For the crust1 1/2 cups graham cracker crumbs1/2 cup unsalted butter, melted For the filling1 cup creamy peanut butter8 oz cream cheese, softened1 cup powdered sugar1 teaspoon vanilla extract1 1/2 cups heavy whipping cream (cold) For the topping1/2 cup chocolate chips (melted)1/4 cup peanut butter (melted)Optional: chopped peanuts, mini chocolate chips, or candy pieces … Read more
 - How Long to Boil Corn on the Cob So It’s Perfectly Cooked
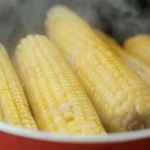 The Perfect Ear: A Gentle Guide to Boiling Corn on the Cob There are few tastes that whisper summer quite like corn on the cob—sun-warmed kernels bursting with sweetness, steam rising in the evening air, butter melting into every golden row. Yet so many of us have pulled an ear from the pot only to … Read more
 - Uncovering the Story Behind This Wooden Artifact
 You’ve discovered more than an antique—you’ve found a testament to a quieter way of living. This weathered wooden cheese press, with its smooth-worn surfaces and purposeful design, carries the weight of generations who understood that the finest things in life cannot be rushed. What It Is: A Tool of TransformationThis is a traditional wooden cheese … Read more
 - Oatmeal, Apple & Carrot Healthy Bake (No Sugar, No Flour)
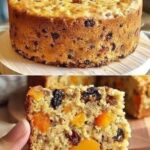 A naturally sweet, wholesome recipe made with oats, fruit, and veggies—perfect for breakfast or a guilt-free snack. Ingredients2 cups (200 g) rolled oats, blended into a coarse flour1 teaspoon baking powder1 cup (240 ml) milk of your choice1 carrot, finely grated1 apple, grated or finely chopped9 dried apricots, rinsed with hot water and chopped4 tablespoons … Read more
 - Liver and Onions
 Ingredients1 lb beef liver, cut into bite-sized pieces1 large onion, thinly sliced1 cup beef broth1/2 cup milk (for soaking the liver)1/3 cup all-purpose flour2 tablespoons oil or butter1 teaspoon salt1/2 teaspoon black pepper1/2 teaspoon garlic powder1/2 teaspoon paprika (optional) Instructions Tips Do not overcook the liver to keep it tenderA little lemon juice at the … Read more