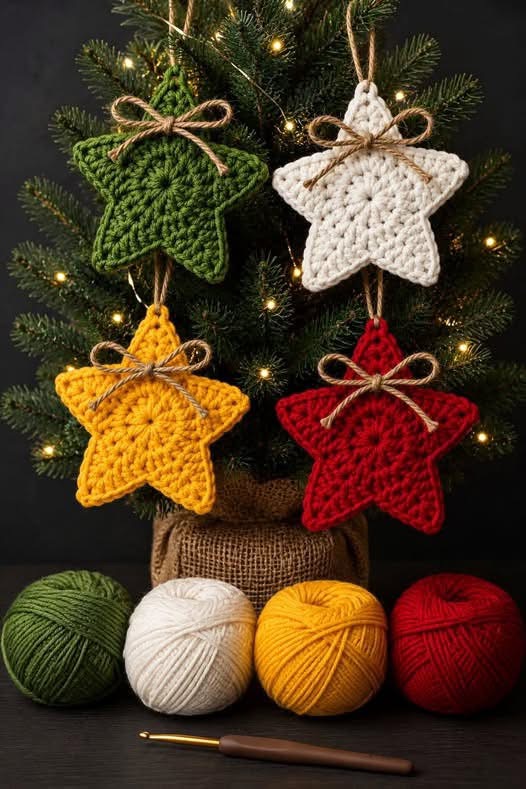
Materials
Medium-weight worsted yarn in the color of your choice
Crochet hook 4.0 mm
Tapestry needle
Scissors
Small amount of contrasting yarn for the hanging loop
Thin jute or decorative cord for the bow
Optional: fabric stiffener
Abbreviations
MR: magic ring
ch: chain
sl st: slip stitch
sc: single crochet
hdc: half double crochet
dc: double crochet
tr: treble crochet
st: stitch
sp: space
sk: skip
inc: 2 stitches in the same stitch
Main Star
Make a magic ring.
Round 1
Ch 3. This counts as the first dc.
Work 9 dc into the magic ring.
Pull the ring closed.
Sl st into the top of the beginning ch-3.
You should have 10 dc.
Round 2
Ch 3.
Work 1 dc in the same stitch.
Work 2 dc in every stitch around.
Sl st to the top of ch-3.
You should have 20 dc.
Round 3
Ch 1.
Sc in the same stitch.
Work the following sequence around:
1 sc in the next stitch
2 hdc in the next stitch
1 dc in the next stitch
2 tr in the next stitch
1 dc in the next stitch
2 hdc in the next stitch
1 sc in the next stitch
Repeat the sequence around the circle, adjusting slightly if necessary so the increases remain evenly distributed.
Sl st to the first sc.
Forming the Five Points
The next round creates the five-point star shape.
Choose five evenly spaced sections around the circle.
For each point:
Sl st across to the center of the section.
Ch 2.
Work 1 hdc.
Work 2 dc.
Work 2 tr.
Ch 2.
Sl st into the same base stitch.
This creates the tip of one star point.
Continue around the circle, making five identical points.
When all five points are completed, sl st back to the beginning.
Fasten off.
Star Border
Join yarn at the bottom of one point.
Ch 1.
Work sc evenly around the entire outside edge.
At each sharp point, work:
1 sc, ch 1, 1 sc
This keeps the point sharp.
At each inside valley between points, work 1 sc or 1 sl st depending on how deep the valley is.
Continue around the entire star.
Sl st to the first sc.
Fasten off and weave in the ends.
Angel Head
For the small head at the top:
Make a magic ring.
Round 1:
Ch 2.
Work 10 hdc into the ring.
Pull the ring closed.
Sl st to the first hdc.
Round 2:
Ch 1.
Work 2 sc in each stitch around.
Sl st to the first sc.
Fasten off.
The head should be approximately 2–3 cm wide.
Sew the head securely to the upper center of the star.
Angel Wings
For each side of the angel wings, join yarn near the upper portion of the star.
Left wing
Ch 6.
Starting in the second chain from the hook:
1 sc
1 hdc
1 dc
1 tr
Sl st into the base of the wing.
Fasten off.
Right wing
Repeat the same process on the opposite side.
Sew or crochet the wings securely to the back of the angel.
Hanging Loop
Attach yarn to the top center of the angel.
Ch 25–30.
Sl st into the same attachment point to form a loop.
Fasten off.
Weave the end securely through the stitches.
Decorative Bow
Cut approximately 30–35 cm of thin jute cord.
Tie a small bow around the upper body, just below the angel’s head.
Trim the ends evenly.
For the ornaments in the photo, use:
Green yarn for the green ornament
Cream or white yarn for the white ornament
Mustard/golden yarn for the yellow ornament
Red yarn for the red ornament
Finishing
Weave in all yarn tails.
Gently stretch the star points so they are symmetrical.
If you want a firmer Christmas-tree ornament, lightly apply fabric stiffener and allow it to dry completely while shaped flat.
The finished ornament should be approximately 10–13 cm tall depending on your yarn and hook size.
For a set matching the photo, make four ornaments using the same pattern in green, cream, golden yellow, and red.