Homemade Vanilla Soft Serve Ice Cream
Introduction
Soft serve ice cream is the epitome of summer treats—smooth, creamy, and light. Whether you’re making it in cones, cups, or storing it in the freezer for later, this recipe captures the sweet nostalgia and perfect swirl of classic soft serve.
Ingredients
For the soft serve base:
- 2 cups whole milk (cold)
- 1½ cups heavy whipping cream (cold)
- ¾ cup granulated sugar
- 1 tbsp vanilla extract (or vanilla bean paste for a deeper flavor)
- 1 tbsp cornstarch (optional, for thickening)
- Pinch of salt
Optional for extra creaminess:
- 1 tbsp milk powder
- 1 tbsp corn syrup or glucose syrup (for smoother texture)
Instructions
Step 1: Mix the Base
- In a large mixing bowl, whisk together the milk, cream, and sugar until fully dissolved.
- Add vanilla extract, a pinch of salt, and optional milk powder and corn syrup.
- If using cornstarch, dissolve it in 2 tablespoons of the milk before adding to the mix.
Step 2: Chill the Mixture
- Transfer the base to a container and refrigerate for at least 4 hours, or overnight for best results.
- This ensures the mixture is very cold before churning, which gives you that smooth soft-serve texture.
Step 3: Churn It
- Pour the cold mixture into an ice cream maker and churn according to the manufacturer’s instructions (usually 20–25 minutes).
- You’re aiming for a texture that’s softer than traditional ice cream—just like a thick milkshake or frozen yogurt.
Step 4: Serve Immediately or Freeze
- Serve immediately from the machine for a true soft-serve experience (cone or cup).
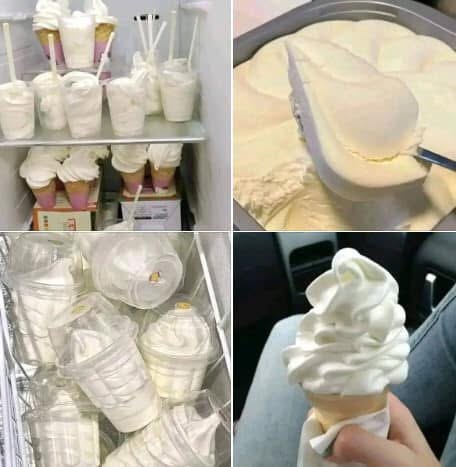
- OR pipe it into cups, cones, or freezer-safe containers and freeze for 1–2 hours to set just slightly for that iconic swirl (as seen in your image).
Methods & Tips
- No Ice Cream Maker? Pour the mixture into a ziplock bag, lay flat in the freezer, and massage it every 30 minutes until it thickens.
- For swirls: Fill a piping bag with a large star tip to replicate that classic soft-serve swirl.
- To store: Cover tightly and keep in the freezer for up to 2 weeks. Let sit at room temperature for 5–10 minutes before serving.
Formation Ideas (Like the Image)
- Plastic cups with lids – perfect for grab-and-go frozen treats.
- Ice cream cones – wrap with a napkin and swirl with a piping bag.
- Tubs or trays – scoop like traditional ice cream if you don’t want a swirl.
History of Soft Serve
Soft serve ice cream dates back to the 1930s, when it was introduced by Dairy Queen and Carvel. Unlike regular ice cream, it’s served at a slightly warmer temperature and has more air whipped in (called overrun), giving it that fluffy, light texture we love.
Benefits
- Lower fat than traditional ice cream (if you adjust cream-to-milk ratio)
- Customizable—you can add fruit puree, chocolate, or matcha
- Fun to make with kids and family
- Easier to digest for some people compared to dense ice cream
Nutrition (Per serving, approx. ½ cup)
- Calories: ~180
- Fat: 10g
- Carbohydrates: 20g
- Protein: 3g
- Sugar: 16g
Note: Values may vary depending on ingredients and additions.
Lovers of This Recipe
- Kids who love soft-serve cones with sprinkles
- Adults reminiscing about childhood ice cream trucks
- Anyone with a sweet tooth and a love for creamy vanilla bliss
Conclusion
This soft serve ice cream recipe brings the creamy magic of ice cream shops into your home freezer. Whether you’re enjoying it straight from the churn or storing it like the picture-perfect cones in your image, it’s sure to please anyone lucky enough to get a scoop (or swirl).