How to Grow Potatoes in Containers at Home with Just One Potato
Growing your own potatoes at home doesn’t require a large garden or a green thumb. With just one sprouting potato and a container, you can harvest fresh, homegrown spuds in a matter of weeks. This guide will show you how to turn a single potato into a productive mini crop right on your patio, balcony, or backyard.
Why Grow Potatoes in Containers?
Container gardening is ideal for people with limited space, poor soil conditions, or a desire for low-maintenance growing. Potatoes thrive in containers because you can easily control soil quality, watering, and harvesting. Plus, it’s fun to watch the plant grow and rewarding to dig up your own potatoes.
What You’ll Need
- 1 sprouting potato (any variety, but avoid treated store-bought ones if possible)
- A large container (5-10 gallon bucket, grow bag, or even a sturdy trash bin with drainage holes)
- Good-quality potting mix or compost
- Optional: organic fertilizer (balanced or high in phosphorus)
- Watering can or hose
Step-by-Step Guide
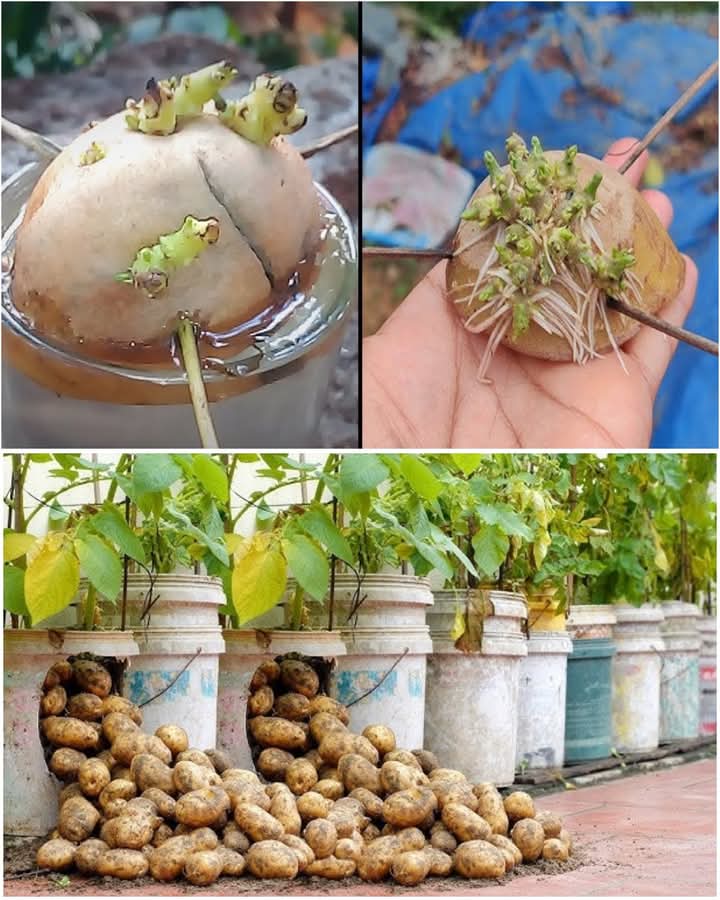
Step 1: Choose the Right Potato
Look for a potato that has started to sprout “eyes”—small buds or shoots. You can use a whole small potato or cut a large one into pieces, ensuring each piece has at least 1-2 healthy eyes. Let cut pieces sit for a day or two to dry and callous over, reducing the risk of rot.
Step 2: Prepare the Container
Choose a container at least 12 inches deep with good drainage. Drill holes in the bottom if needed. Add 4–6 inches of potting soil or compost at the base.
Step 3: Plant the Potato
Place the potato piece (eyes facing up) on the soil and cover it with 3–4 inches of additional soil. Water gently but thoroughly.
Step 4: Water and Wait
Keep the soil evenly moist but not soggy. Within 1–2 weeks, green shoots will emerge. As the plant grows, “hill up” by adding more soil around the base of the plant every time it grows 6–8 inches taller. This encourages more tubers to form along the buried stem.
Step 5: Feed and Care
You can add a balanced organic fertilizer every few weeks to boost growth. Make sure your container gets plenty of sunlight—ideally 6 to 8 hours a day.
Step 6: Harvest Time
After 8–12 weeks, the plant will flower, then start to yellow and die back. This is your signal that the potatoes are ready. Gently dump the container and search through the soil to collect your harvest. Be careful not to puncture the potatoes.
Tips for Success
- Don’t overwater. Soggy soil can cause rot. Let the top inch dry out before watering again.
- Start with organic potatoes. These are less likely to be treated with sprout inhibitors.
- Try different varieties. Yukon Gold, Red Pontiac, or fingerling potatoes grow well in containers.
Final Thoughts
With just one potato and a bit of patience, you can grow a surprising amount of food in a small space. Container-grown potatoes are fresher, tastier, and often more satisfying than store-bought ones. So grab a pot, find a sunny spot, and start your mini potato garden today.